Anywho, as the title says, it's very important to be hollow. At least if you're a 3d model. See, all 3d printing companies charge per cubic centimeter of material that your model contains. This means that models can start to cost a lot of money. How much? Frosted Detail (FD) runs $2.39 US per cubic centimeter. If you wanted a high quality 16mm die, that would be 1.6cm^3 * $2.39 or $15.66 per die! Yikes!
To decrease this cost, we hollow out our objects so that they use less material. Generally this does not effect the component, since it's either too small to be effected, or meant for a prototype and will never be used.
*SAGE ADVICE* If you are planning on creating masters for mold making, you will want to be -VERY- wary of hollowing your models. Many mold making processes involve a lot of pressure and heat, and will result in a broken master and ruin mold if the model is too weak. Generally speaking, I advise anyone who plans on 3d printing masters to either use wax for bronze casting or make certain that your prints will be very solid, even if they do cost much more.
Alright, so lets look at the quick and dirty method of hollowing out an object. First open up the object you want to hollow out. In my case, it is a very fancy looking box magazine.
An important thing to keep in mind is structural integrity, both as a requirement for printing and for functionality. In the case of my magazine, it is going to be printed in Frosted Ultra Detail (FUD), which has a minimum wall thickness of .5mm (half a millimeter). In addition, it is meant as an accessory to a machine gun, so it must be able to lock into the machine gun's magazine well without breaking. This means I have to be careful about the guides I design to fit it in place:
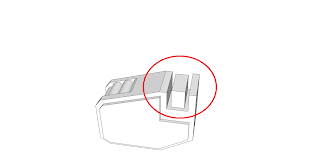
First I'm going to copy the magazine by selecting the Move tool (or M) and pushing the ctrl key once:
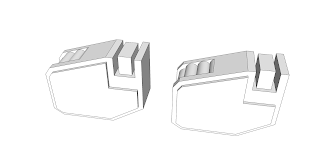
Because I don't want to weaken the magazine guides, I'm going to remove them from the copy:
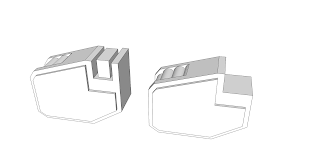
Now that it's cleaned up, I can scale it down, say, 15% using the Scale tool. To scale it exactly 15%, use the scale tool as normal, but type .85 in for the scale amount. If your remember math class from all those years ago, it means you are reducing a number TO 15% of it's original (or reducing it by 15%):
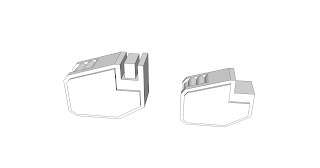
Now for the tricky part. we need to move the smaller magazine so that it is in the exact center of the original. We can do this by creating some center guides. But keep in mind that the smaller version won't light up exactly with the larger one, but we can still find a good fit by using the guides:
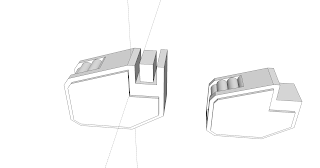
Now, hide part of the large magazine by selecting half of it, right clicking, and selecting Hide from the option menu. This will allow us to move the smaller magazine into place:
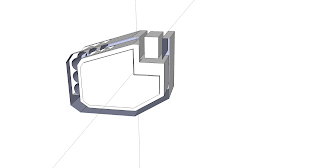
Remember your minimum material thickness, and measure to be certain. If you believe some areas may be too thin, just scale down the model by 5%. Once everything looks good, select the entire model, right click on it, and select Reverse Faces from the menu. This will make the distinction between the inner and outer walls:
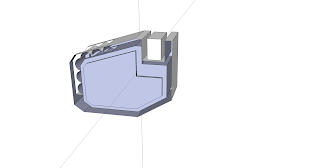
Almost there!
Now Select both models by drag selecting. Right click them and select Explode from the option menu. This will break both of them out of the component state, and allow them to be recombined as a single model:
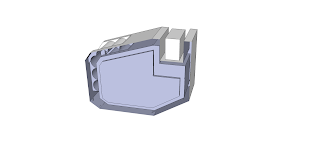
And that is the cheap and easy way to hollow out a model. You can actually hollow very complex models in a similar way. However, not all models can be hollowed using this method, but I'll cover that in another blog post.
Until then, thanks for reading!
Great post, Stephen. I enjoy your conversational writing style.
ReplyDeleteOne thing to keep in mind is that the interior and exterior need to be connected for Shapeways to recognize the model as hollow. An easy way to do that is to make a small hole in an inconspicuous place.
Make a cylinder, place it so it touches both interior and exterior geometry, select all, intersect selected, then clean up the extra.
Keep up the good work!
So far, ShapeWays hasn't flagged any of my model uploads, but thanks for the feedback. I know that some problems aren't detected until printing begins, and sometimes a model that prints fine one day suddenly gets rejected. It can be frustrating, but all new technology is.
ReplyDeleteI'm glad you enjoy my writing style (at least for blogs). I'll probably be posting my work for a while, and less tutorials. More on that later.