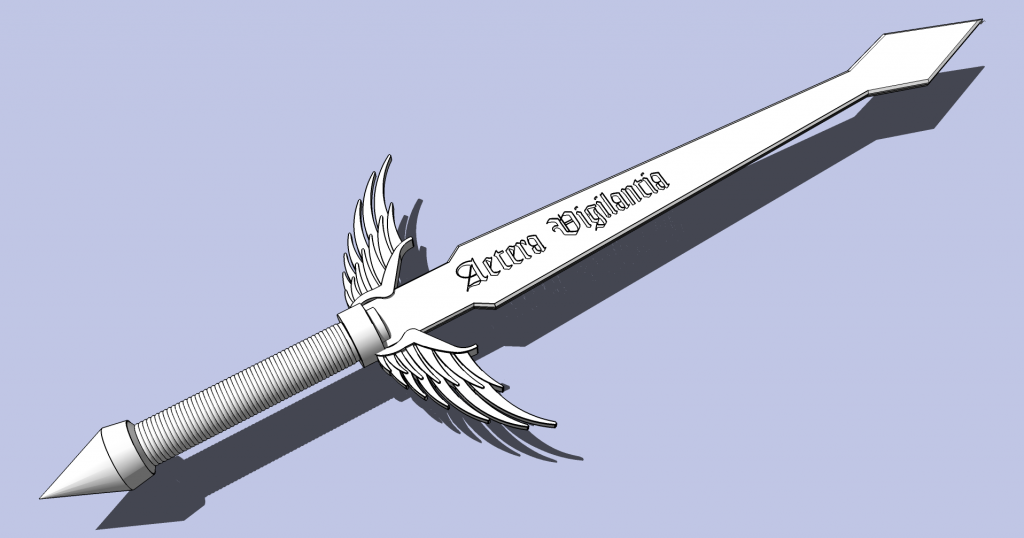
Hey bloggers! It's been a while since I've updated (and worked with anything 3d, for that matter!) but I did finally get some time to work on a sword. The idea was to make a Dark Angel themed weapon that could also be used on other miniatures. My first attempt was not impressive and was too animeish:
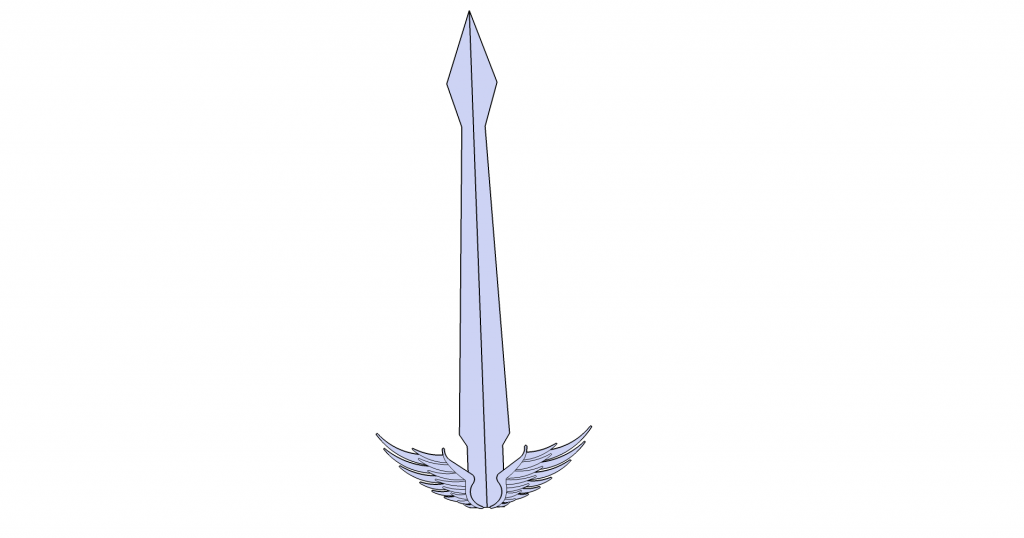
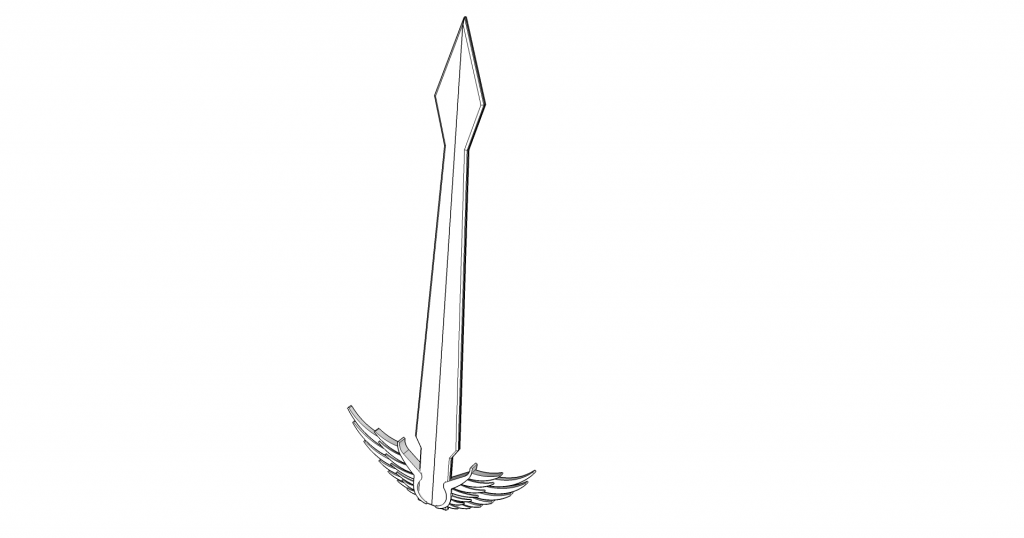
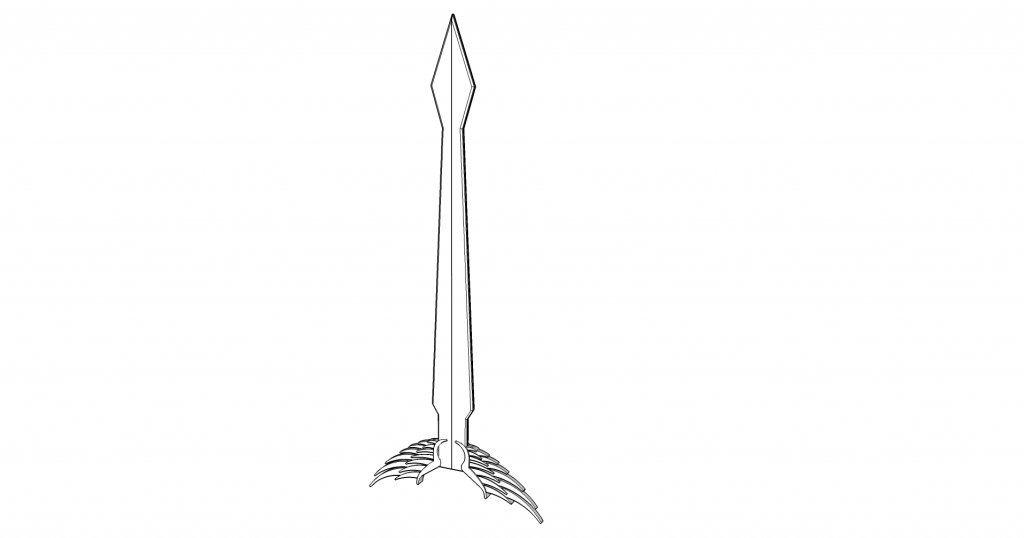
Never one to give up, I archived it and started fresh. First I broke up the parts of the sword into multiple components for future use (something I have been reminding myself that I need to do. This gave me a pommel, grip, cross guard, and blade. The blade and cross guard I started working on immediately to get something that fit:
Though Dark Angels traditional have a back-swept cross guard, I decided to go with the more forward and out-swept version.
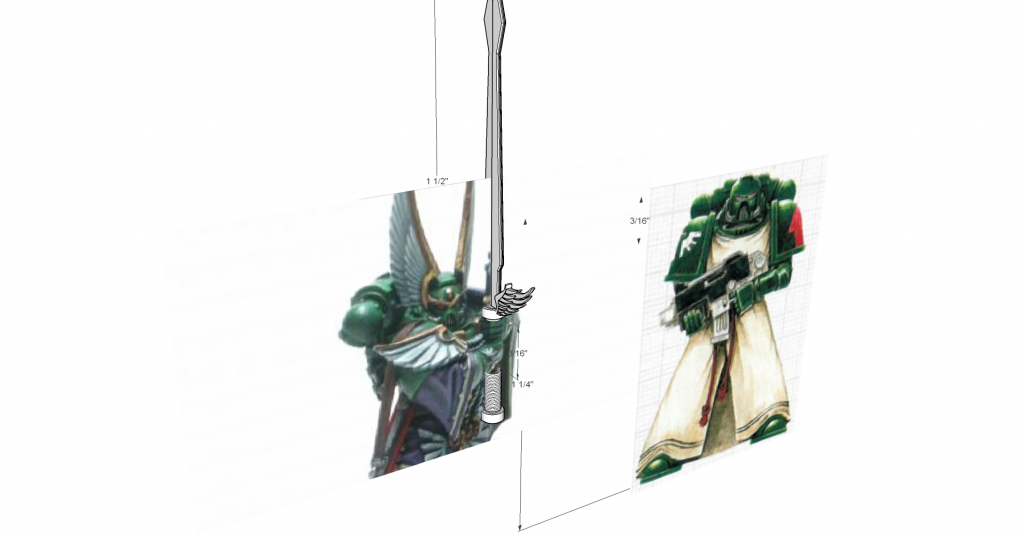
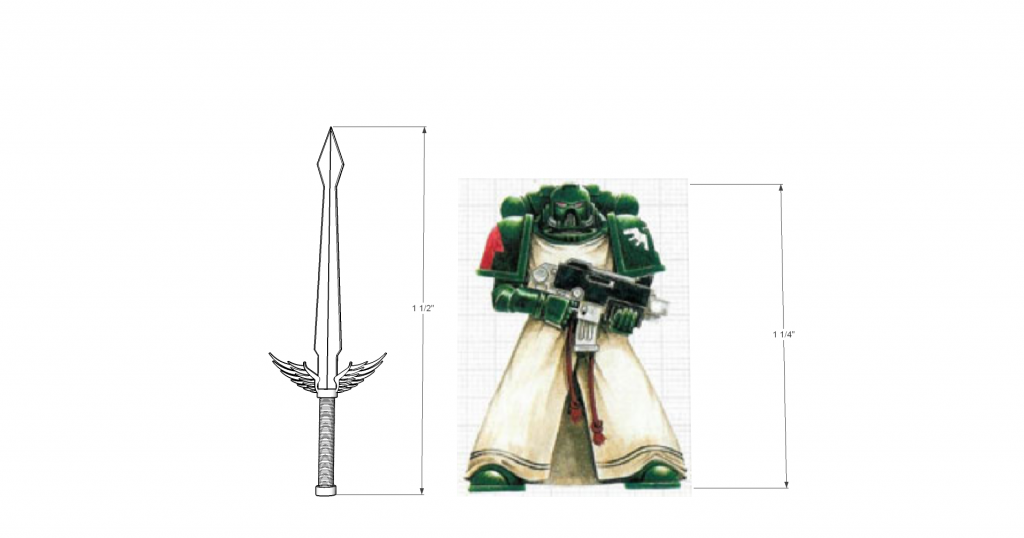
With this complete, I added the grip and imported a few pictures for reference. I measured them out and scaled them to the proper size:
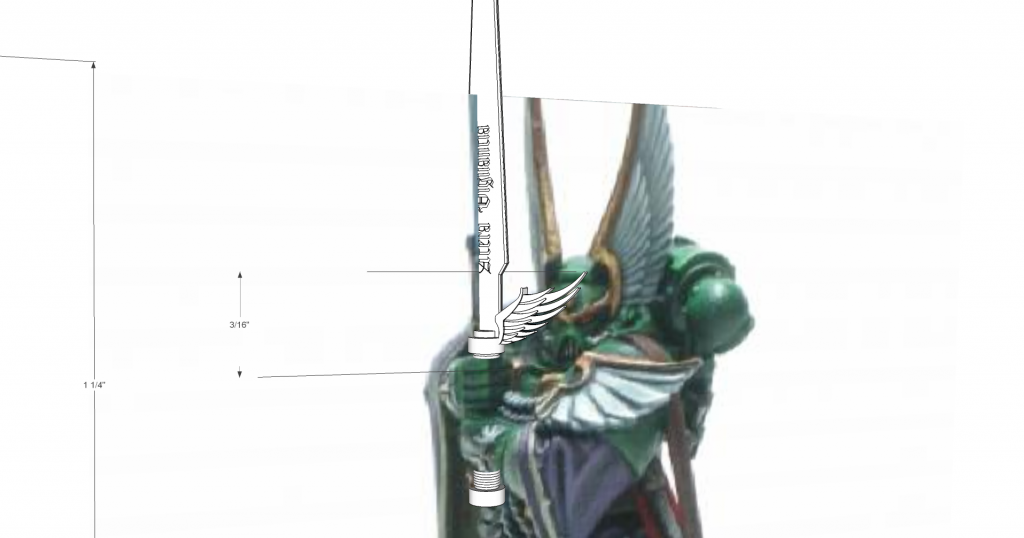
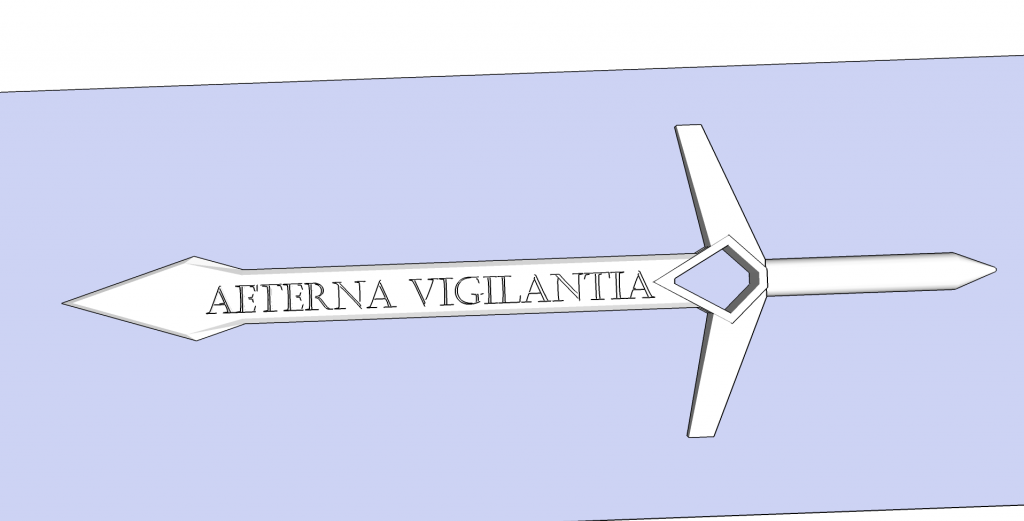
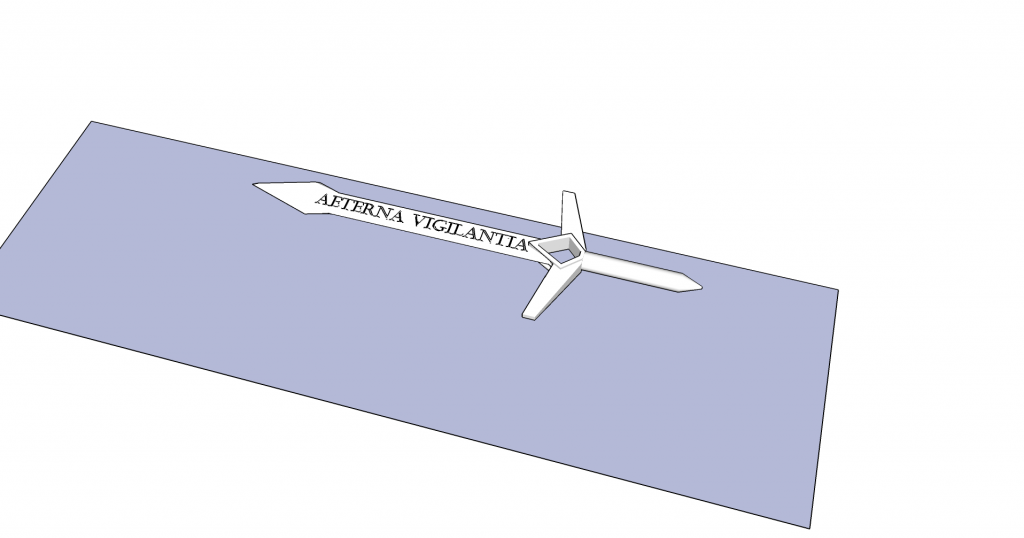
The grip is, of course, too long, but that will be fixed in a bit. I added the swords name "Atera Vigilantia" [sic]. Unfortunately, the spelling was off. The words are raised from being 3d text:
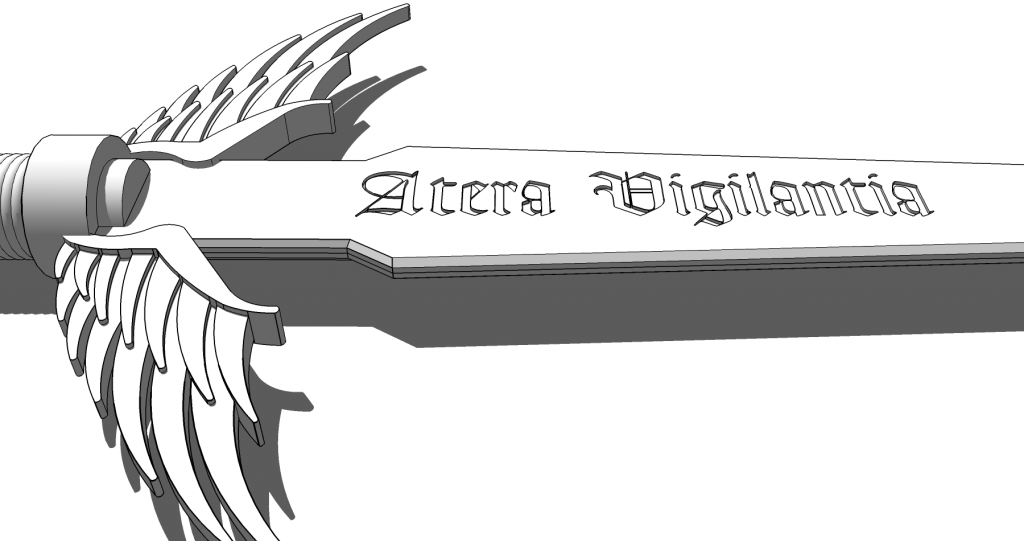
I then embedded the text into the blade so it looked like an engraving:
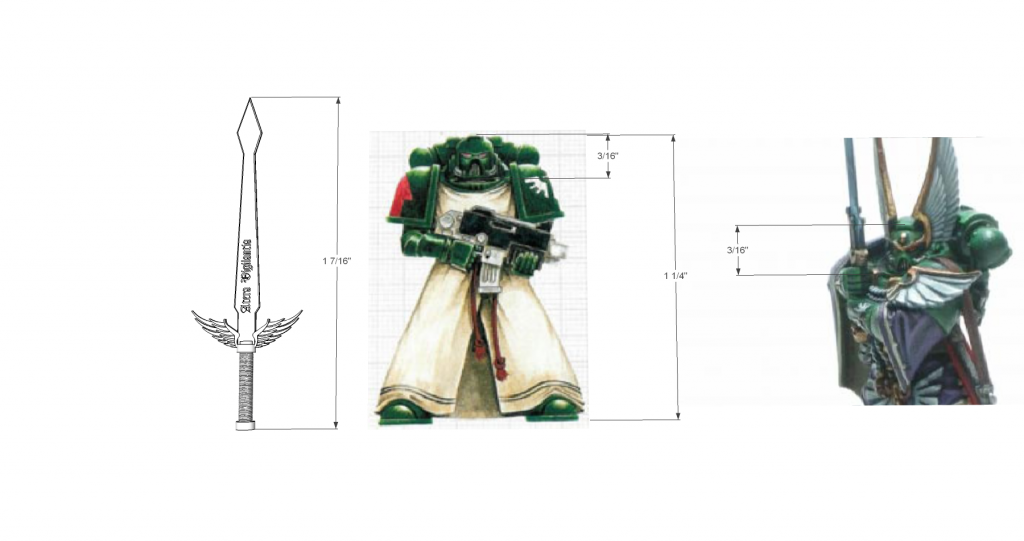
I shortened the grip and referenced the size again to see if I was on the mark:
Much better!
I created the pommel and the sword was complete:
Total time was around 5 or 6 hours. I used a method called projection to make the cross guard. I'll probably make a full entry/tutorial about it as my blog ramps back up. Until then, you can see some of my work on livestream (including the projection) on LiveStream.
Until next time!
This blog covers making 3d models for rapid prototyping and 3d printing. Topics including how-to guides, best practices, samples of work, and material reviews.
Showing posts with label 3d printing. Show all posts
Thursday, October 4, 2012
Sunday, July 1, 2012
Long Time Coming
It's been a while since I posted. Ironically, I've had the turret for the tank tutorial done for a couple of months, I've also had to create documentation for a food bank program, write a loan tracking app, design a website, and still run HPR radio.
If only I could clone me, then I could find myself and say get back to work. Seriously though, I am still working on the 3d and miniature market. In fact, you'll see something big hit kickstarter in the next few months.
I'll definitely post more news as I can, and as always, new ways to make your design easier.
Oh, and as an aside, sketchup was bought by Trimble. Whether or not it will remain free is uncertain. I'm going to spend some time to learn blender so that I can hopeful help others who follow the same path, but it is not a simple program.
Anyway, until next time!
If only I could clone me, then I could find myself and say get back to work. Seriously though, I am still working on the 3d and miniature market. In fact, you'll see something big hit kickstarter in the next few months.
I'll definitely post more news as I can, and as always, new ways to make your design easier.
Oh, and as an aside, sketchup was bought by Trimble. Whether or not it will remain free is uncertain. I'm going to spend some time to learn blender so that I can hopeful help others who follow the same path, but it is not a simple program.
Anyway, until next time!
Sunday, April 29, 2012
Bonus Post
A few posts ago, I posted a mock-up of our new office. I made a few updates to it. I think I will spend a little time cleaning up all the models for use with 3d printing. It would be a neat project, I think, to make an entire series of "office" prints so people can literally make their own office in a little box on their desk. Who wouldn't want their cubical in their cubical?
By the way, I textured the monitors, whiteboard, and poster with custom textures. I'll have to do a walk through on that after the tank.
What is 3d Printing
I've noticed that many people are still confused about 3d printing, its application, and what it means for the war gaming hobby and crafts in general. Let me take a moment to lay everything out and set the record straight.
3D printing, also known as rapid prototyping, is a method of printing layers of material (generally plastic) until the desired shape and volume is reached. This process can create highly complex and fully functional models, such as transmissions, wrenches, aircraft, etc. The primary use is for rapid prototyping parts. You could, for example, 3d print a model airplane for wind tunnel testing, or the plastic shell of an MP3 player. By printing an artists 3d design before sending it for mold tooling, you can be absolutely certain that everything is to spec and fits the way it is supposed to. While this process is relatively inexpensive (a failed mold can cost a company up to $150,000) it is still costly for amateur hobbyists.
Recently, small start-up miniature companies have turned to 3d printing to produce masters. Several of the newer 3d printing machines can achieve levels of detail equal to and sometimes even better than hand sculpted models. Many of the printing resins are also similar to the cast resins, so companies can test model durability and adjust the shape or thickness as needed to prevent problems during the casting process. One of the largest advantages is the ability to reuse the same model multiple times before printing or casting.
Digital models are easily reposed, allowing multiple variations of the same model to be created in minutes. Finally, using a base model, you can create dozens of unique models in the time it takes to sculpt a single model. Digital modeling is also easier to learn and a more widely available skill set than sculpting, making it cost effective and viable for even the most cash-strapped company.
What 3D Printing Is:
3D printing, also known as rapid prototyping, is a method of printing layers of material (generally plastic) until the desired shape and volume is reached. This process can create highly complex and fully functional models, such as transmissions, wrenches, aircraft, etc. The primary use is for rapid prototyping parts. You could, for example, 3d print a model airplane for wind tunnel testing, or the plastic shell of an MP3 player. By printing an artists 3d design before sending it for mold tooling, you can be absolutely certain that everything is to spec and fits the way it is supposed to. While this process is relatively inexpensive (a failed mold can cost a company up to $150,000) it is still costly for amateur hobbyists.
Recently, small start-up miniature companies have turned to 3d printing to produce masters. Several of the newer 3d printing machines can achieve levels of detail equal to and sometimes even better than hand sculpted models. Many of the printing resins are also similar to the cast resins, so companies can test model durability and adjust the shape or thickness as needed to prevent problems during the casting process. One of the largest advantages is the ability to reuse the same model multiple times before printing or casting.
Digital models are easily reposed, allowing multiple variations of the same model to be created in minutes. Finally, using a base model, you can create dozens of unique models in the time it takes to sculpt a single model. Digital modeling is also easier to learn and a more widely available skill set than sculpting, making it cost effective and viable for even the most cash-strapped company.
What 3d Printing is Not:
Despite what some people believe, 3d modeling is not going to replace casting. several people have made the argument that the technology will be similar to inkjet printers, and soon be in every home. There are two major flaws to this theory:
1) Not everyone cares about 3d printing. Most people would struggle to find a single use for it and a machine capable of printing a somewhat large (12" x 6" x 6") object would be at least as large as a current all-in-one printer. That's a lot of space on your desk for something you don't use.
2) Material cost.
Consider this: When was the last time you printed a 300 page book on your inkjet? Chances are, you never have. This is because your print would be low quality and literally destroy your print cartridges. A $10 paperback would cost you $40 in ink. Print studios can run a hundred thousand books for less than a dollar per book in order to make a profit.
Casting carries the same theory. Using one spin caster, you can cast about 50 models per minute. It takes about 20 minutes to print the same quantity on a 3d printer, and the material is much more expensive. Also, there are several, similar machines that never quite reached the $30 walmart level. Laser cutters and plasma cutters, and multi-axis CAMs are all still pretty expensive, and not available in your local electronics store. Though several models (and some higher end used machines) are within the price of hobbyists.
Now, that is not to say you won't have a 3d printer sitting on your desk. I fully expect that you can create your own models or download files to print (either free or purchased) someday. However, don't expect them to match the quality of large printers, or that you'll somehow have a cheaper set of miniatures. Producing custom parts adds a nice touch, but it won't be any cheaper than buying a box set!
Another belief is that this will chase out large companies, such as Games Workshop or Privateer Press. This is very unlikely to happen. Not only will their mass casting be cheaper, but attempting to copy ever model will becoming an impossibly daunting task. They currently have hundreds of models. Each model would need to be either 3d scanned (an expensive prospect in itself) or manually copied in a 3d program. Scanning is right out, since it requires expensive hardware in a centralized location. The lawsuit would be swift and brutal.
Even distributed, manually copying each and every model would simply take too long. By the time one model is finished, a new round of models would be released. You would have the option of waiting months for a suitable print file, or you could just buy them.
So, to recap:
DO
- Make low cost masters for molds.
- Try out new ideas before committing.
- Make unique and custom parts.
DON'T
- Try to print hundreds of miniatures.
- Hold out for $30 home printers.
- Expect game studios to fold.
Thursday, April 26, 2012
Rampant Miniaturization
So my very small company is moving into a very small office. My business partner and I went to inspect it and take measurements. This morning I decided to start creating it in sketch-up. I made a decent mockup of what the office would look like when we are done:
To save time, I downloaded the chairs, coffee pot, refrigerator, monitors, keyboards, and computers from the 3d warehouse. I then textured the doors, desks, floors, white board, server rack, and monitor screens. The monitor and white board textures are custom materials.
I showed my friend, and he said "you know, we should 3d print this so we have a little model of our room that we can rearranged and see how everything fits."
That could be a brilliant idea. If we decide to do that, I'll post the final print outs on here.
Labels:
3d printing,
architecture,
design,
draft,
materials,
office,
photo,
sketchup,
texture
Monday, March 12, 2012
Working with round objects part 2
Now that we have the basics down, lets look at something that puts these ideas into practice, such as a space marine shoulder pad. At first glance, the shoulder pad looks simple, right? Just make a circle, then a cone and you're 50% there.
I wish it were that simple.
Let me take a moment to point out an infinitely useful tool to have if you have your heart set on miniature design: a digital caliper. This inexpensive measuring tool will certainly save your bacon on multiple occasions, and it's worth knowing how to use one.
Anyway, I digress. We need to be diligent and make certain that our shoulder pad is going to fit on the intended model. The are two surfaces we need to make a note of. The first is the outer surface. This must be small enough to fit in front of the back pack, and the top must not come into contact with the marine's head. It is also a good idea to keep track of the size so it doesn't get out of hand and look ridiculous on the model.
The second, and by far most important surface, is the inner section where the shoulder pad is glued to the arm. The angles MUST be very similar to the shoulder so that the pad makes good contact and remains in place when glued. If there is too much variation, the shoulder pad could fall off or decrease the spacing between the backpack and the outer surface.
Remember your crusty old shop teacher when he said measure twice and cut once? Measure 3 times and print once is the saying here. If you don't measure correctly, it could cause a lot of pain and hours of wasted work.
As you take measurements, make certain to write them down in clear, concise fields on a notebook. I'll probably do a section on keeping your data organized in the future. Basically, you don't want to have to go back and remeasure everything if you start on a new model.
Areas to measure:
Measure the height and width of the interior and exterior sections.
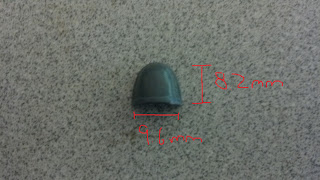
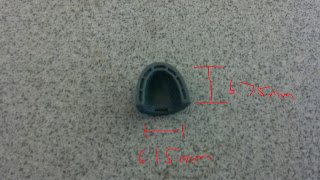
Next, take two shoulder pads and push them together so that they look like this:
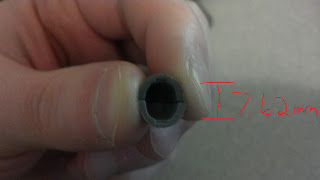
The first thing you should notice is that it is asymmetrical. That means that simply using the previous methods will not create a workable shoulder pad. For this, we have to introduce a couple new tools.
Before we do that, however, I need to make a quick comment about scaling. Make certain that everything is in Meters, not millimeters. Sketchup does not work well with small dimensions, but can very easily scaled a model in meters down to millimeters.
First, start by creating a circle with the Circle tool. Give it a radius of 3.075 (giving a full diameter of 6.15):
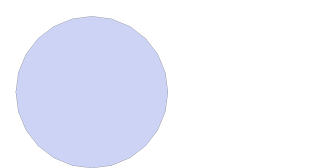

Next, use the Guide tool to make a guide in the center and a mark at 7.6m:
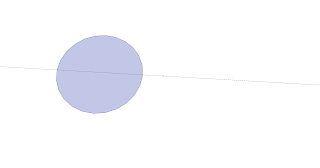

This shows how much larger the circles needs to become to form into the oval shape of the interior shoulder pad. However, we are not ready to change its size just yet. Before we can do that, we need to add height and then volume.
Make another circle inside of the first circle with the same dimensions:
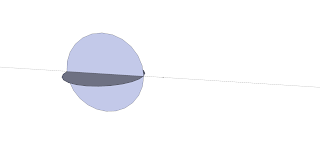
Once you have done this, mark the center portion with the Line tool to divide everything:
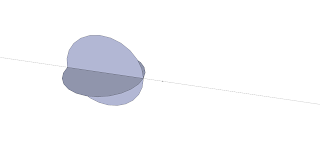

Delete the excess lines by using the Select tool and the delete button on your keyboard:
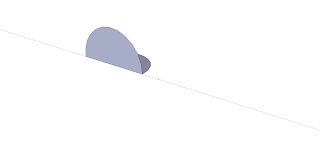
Alrighty, now it's time to make one more guide. This one will be 6.75m to the top of the shoulder:
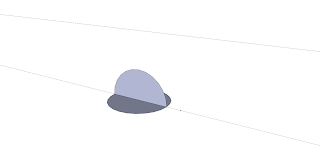
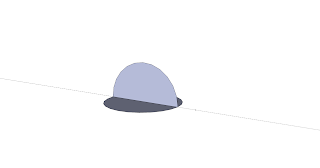
Ready to add volume? To do this, we just draw a line down the middle of the second circle to divide it in half, and then delete that half, then use the follow me tool to make a half cylinder. Don't forget to use shift to select both sides of the cirlce:
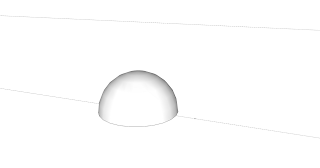
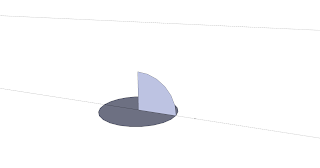
So far, so good. Now its time to stretch the model to the right proportions. Select the model with the Select tool, and then click the Scale tool. Drag the model until it touches the guides:
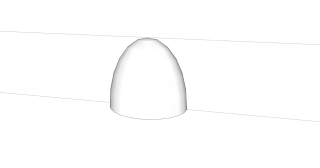
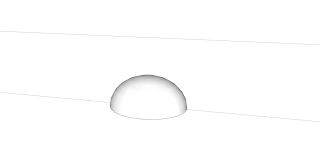

And now we are very close to having the interior completed. To do this, we need to divide the model in half, but also retain a face on the flat surface. The quickest way I've discovered to do this, is simply draw a square in the middle of the model using the Square tool:
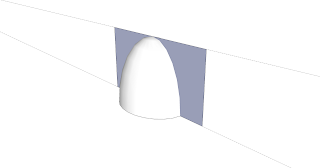

Using the guides that are already in place is the best way to keep the square perfectly centered. Once this is completed, drag select the entire model, right click on it, and select Intersect Faces > With Selection. The model will be deselected, but if you select any portion of it, you'll noticed that everything has merged. Delete the square and half of the model:
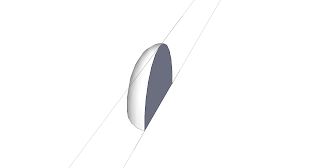
Congratulations, you now have the interior section of a shoulder pad! I recommend saving this as component. I'll cover component usage in another blog post.
We'll finish up the shoulder pad tomorrow, but see if you can do it on your own, using what you have learned so far.
I wish it were that simple.
Let me take a moment to point out an infinitely useful tool to have if you have your heart set on miniature design: a digital caliper. This inexpensive measuring tool will certainly save your bacon on multiple occasions, and it's worth knowing how to use one.
Anyway, I digress. We need to be diligent and make certain that our shoulder pad is going to fit on the intended model. The are two surfaces we need to make a note of. The first is the outer surface. This must be small enough to fit in front of the back pack, and the top must not come into contact with the marine's head. It is also a good idea to keep track of the size so it doesn't get out of hand and look ridiculous on the model.
The second, and by far most important surface, is the inner section where the shoulder pad is glued to the arm. The angles MUST be very similar to the shoulder so that the pad makes good contact and remains in place when glued. If there is too much variation, the shoulder pad could fall off or decrease the spacing between the backpack and the outer surface.
Remember your crusty old shop teacher when he said measure twice and cut once? Measure 3 times and print once is the saying here. If you don't measure correctly, it could cause a lot of pain and hours of wasted work.
As you take measurements, make certain to write them down in clear, concise fields on a notebook. I'll probably do a section on keeping your data organized in the future. Basically, you don't want to have to go back and remeasure everything if you start on a new model.
Areas to measure:
Measure the height and width of the interior and exterior sections.


Next, take two shoulder pads and push them together so that they look like this:

The first thing you should notice is that it is asymmetrical. That means that simply using the previous methods will not create a workable shoulder pad. For this, we have to introduce a couple new tools.
Before we do that, however, I need to make a quick comment about scaling. Make certain that everything is in Meters, not millimeters. Sketchup does not work well with small dimensions, but can very easily scaled a model in meters down to millimeters.
First, start by creating a circle with the Circle tool. Give it a radius of 3.075 (giving a full diameter of 6.15):

Next, use the Guide tool to make a guide in the center and a mark at 7.6m:

This shows how much larger the circles needs to become to form into the oval shape of the interior shoulder pad. However, we are not ready to change its size just yet. Before we can do that, we need to add height and then volume.
Make another circle inside of the first circle with the same dimensions:

Once you have done this, mark the center portion with the Line tool to divide everything:

Delete the excess lines by using the Select tool and the delete button on your keyboard:


Alrighty, now it's time to make one more guide. This one will be 6.75m to the top of the shoulder:

Ready to add volume? To do this, we just draw a line down the middle of the second circle to divide it in half, and then delete that half, then use the follow me tool to make a half cylinder. Don't forget to use shift to select both sides of the cirlce:


So far, so good. Now its time to stretch the model to the right proportions. Select the model with the Select tool, and then click the Scale tool. Drag the model until it touches the guides:


And now we are very close to having the interior completed. To do this, we need to divide the model in half, but also retain a face on the flat surface. The quickest way I've discovered to do this, is simply draw a square in the middle of the model using the Square tool:

Using the guides that are already in place is the best way to keep the square perfectly centered. Once this is completed, drag select the entire model, right click on it, and select Intersect Faces > With Selection. The model will be deselected, but if you select any portion of it, you'll noticed that everything has merged. Delete the square and half of the model:

Congratulations, you now have the interior section of a shoulder pad! I recommend saving this as component. I'll cover component usage in another blog post.
We'll finish up the shoulder pad tomorrow, but see if you can do it on your own, using what you have learned so far.
Monday, March 5, 2012
First Post
Ah, so here we go, a blog. Where to begin? Maybe I should start with my intentions.
Keep in mind, I am not an artist, not in the least sense of the word. I make horrible stick figures and scraped by my high school drawing class with a D+. But, I was rather taken recently by the prospect of 3d modelling. Interestingly enough, 3d modelling is not a normal medium like oil or charcoal. No, it is its own, unique form of art.
Those of you interested in it might rejoice in the fact that it does not require great artistic talent to master. At least, not that I have seen so far.
Also let it be known that I have taken no classes or made any studies in the field of 3d art or animation. Everything in this blog will be from my own trial and error, and perhaps, a way for you to avoid the same pitfalls. I do not assume to be a master, expert, or even journeyman in such things. But maybe that is for the better. There are more students than teachers, and there is something to be said for group learning.
As a brief history: I started playing with Google Sketchup (v8) in mid-December. My objective - to design a 6mm scale tank (roughly the size of a quarter)for 3d printing by a company called Shapeways. After a few hours of trial and error, I had something that looked like a tank:

I promptly uploaded it to Shapeways, where their automated system promptly laughed me off the internet. See, it's not enough to simply make a 3d model. Printers are very expectant machines. They expect to know where to begin and where to stop. What is on the outside, and what is on the inside. Where one object begins and another ends.
Being only vaguely aware of such things, I started googling anything and everything I could about 3d printing. Finally, I figured out exactly how the model should be put together. But I didn't feel like continuing on my tank yet. I felt I needed to start smaller, with a basic structure that already exists.
So, I started playing with a bolter from Warhammer 40k (a 28mm scale strategy game). I decided I needed to do 2 things. The first, was make a base model to drive all others from. This would have the same dimensions as a normal bolter,so I could add or remove additional features without worrying if the bolter would fit the model it was meant to go with (Space Marines):

Bummer. With that in mind, I decided on
With my base model completed, I decided to make a larger, more "assault rifle" version. I increased overall size by around 40% and and removed the front sight aperture in favor of the holographic sight. I also decided to incorporate combi-weapons, the 40k equivalent of under mounted weapons:

The problem? Well, it was too big:

Bummer. So it was back to the drawing board. I decided that I would decrease the size so it was only about 20% larger, and add modular optics, combi-weapons, and magazines. This way there would be much more customization:

It looked better, but there are still size problems. I'll introduce those in my next post.
The second thing I realized I needed to do, was begin making a component library. In Sketchup, a component is an object or objects that are generally considered finished. You can copy components out of the library and right into the workspace. In this way, I could make a base scope mount. Every time I make a new scope, I just copy the mount in and start working, then save the new scope as a different component.
Because I can very rapidly build from a base model or interlocking component, I'm able to add much more variety to my models than would be possible through conventional modelling. At least, in the span of time it takes me.
The downside is that any changes to the base model will require changes to the components. For example, if the top of the bolter were to become wider, the scope mount would have to be changed to match.
Making modular systems requires a lot of pre-planning so you don't end up doing the same work several times, something I've been learning the hard way and will share in a future blog entry (you're going to notice a pattern here).
So, stay tuned. I have some interesting things planned for the future.
Keep in mind, I am not an artist, not in the least sense of the word. I make horrible stick figures and scraped by my high school drawing class with a D+. But, I was rather taken recently by the prospect of 3d modelling. Interestingly enough, 3d modelling is not a normal medium like oil or charcoal. No, it is its own, unique form of art.
Those of you interested in it might rejoice in the fact that it does not require great artistic talent to master. At least, not that I have seen so far.
Also let it be known that I have taken no classes or made any studies in the field of 3d art or animation. Everything in this blog will be from my own trial and error, and perhaps, a way for you to avoid the same pitfalls. I do not assume to be a master, expert, or even journeyman in such things. But maybe that is for the better. There are more students than teachers, and there is something to be said for group learning.
As a brief history: I started playing with Google Sketchup (v8) in mid-December. My objective - to design a 6mm scale tank (roughly the size of a quarter)for 3d printing by a company called Shapeways. After a few hours of trial and error, I had something that looked like a tank:

I promptly uploaded it to Shapeways, where their automated system promptly laughed me off the internet. See, it's not enough to simply make a 3d model. Printers are very expectant machines. They expect to know where to begin and where to stop. What is on the outside, and what is on the inside. Where one object begins and another ends.
Being only vaguely aware of such things, I started googling anything and everything I could about 3d printing. Finally, I figured out exactly how the model should be put together. But I didn't feel like continuing on my tank yet. I felt I needed to start smaller, with a basic structure that already exists.
So, I started playing with a bolter from Warhammer 40k (a 28mm scale strategy game). I decided I needed to do 2 things. The first, was make a base model to drive all others from. This would have the same dimensions as a normal bolter,so I could add or remove additional features without worrying if the bolter would fit the model it was meant to go with (Space Marines):

Bummer. With that in mind, I decided on
With my base model completed, I decided to make a larger, more "assault rifle" version. I increased overall size by around 40% and and removed the front sight aperture in favor of the holographic sight. I also decided to incorporate combi-weapons, the 40k equivalent of under mounted weapons:

The problem? Well, it was too big:

Bummer. So it was back to the drawing board. I decided that I would decrease the size so it was only about 20% larger, and add modular optics, combi-weapons, and magazines. This way there would be much more customization:

It looked better, but there are still size problems. I'll introduce those in my next post.
The second thing I realized I needed to do, was begin making a component library. In Sketchup, a component is an object or objects that are generally considered finished. You can copy components out of the library and right into the workspace. In this way, I could make a base scope mount. Every time I make a new scope, I just copy the mount in and start working, then save the new scope as a different component.
Because I can very rapidly build from a base model or interlocking component, I'm able to add much more variety to my models than would be possible through conventional modelling. At least, in the span of time it takes me.
The downside is that any changes to the base model will require changes to the components. For example, if the top of the bolter were to become wider, the scope mount would have to be changed to match.
Making modular systems requires a lot of pre-planning so you don't end up doing the same work several times, something I've been learning the hard way and will share in a future blog entry (you're going to notice a pattern here).
So, stay tuned. I have some interesting things planned for the future.
Subscribe to:
Posts (Atom)